On-Farm Mastitis Bacteria Identification Tool
Mastitis Treatment Decision System
Why is this tool valuable?
Mastitis is the most frequent cause of antibiotic use on dairy farms. Various bacteria can cause udder infections, some of which have higher rates of self-curing or respond poorly to treatment. Correct identification is crucial to allow dairy producers and veterinarians to select, if needed, targeted treatments without compromising or delaying recovery.
Advantages
- Allows identification and targeting of cases caused by Gram + bacteria (requiring treatment)
- Quicker identification of bacteria compared to bacterial cultures in laboratory (not replace it)
- More rational use of antibiotics
- Decreased milk losses
- Decreased risk of antibiotic residues
Limitations
-
Care required in technique to avoid contamination
-
Interpretation influenced by the experience and training of the user
-
Cannot identify mycoplasma and yeasts (treatment not recommended)
Gram positive bacteria
- Mainly staphylococci and streptococci
- Thin cell walls
Exemples of Gram positive
- Staphylococcus aureus
-
Staphylococcus spp.
-
Streptococcus uberis
-
Streptococcus dysgalactiae
-
Streptococcus agalactiae
-
Corynebacterium bovis
Gram negative bacteria
- Mainly coliforms
- Thick cell walls which protect against the effects of most antibiotics, detergents and chemicals
- Contain toxic lipopolysaccharides
- Do not respond well to antimicrobial treatment
Exemples of Gram negative
- Escherichia coli
- Klebsiella spp.
- Enterobacter spp.
- Serratia spp.
- Pasteurella spp.
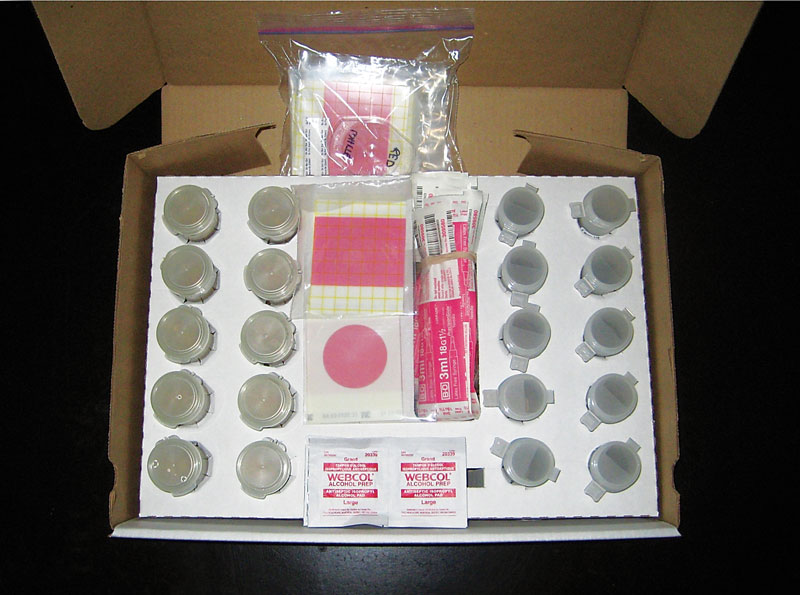
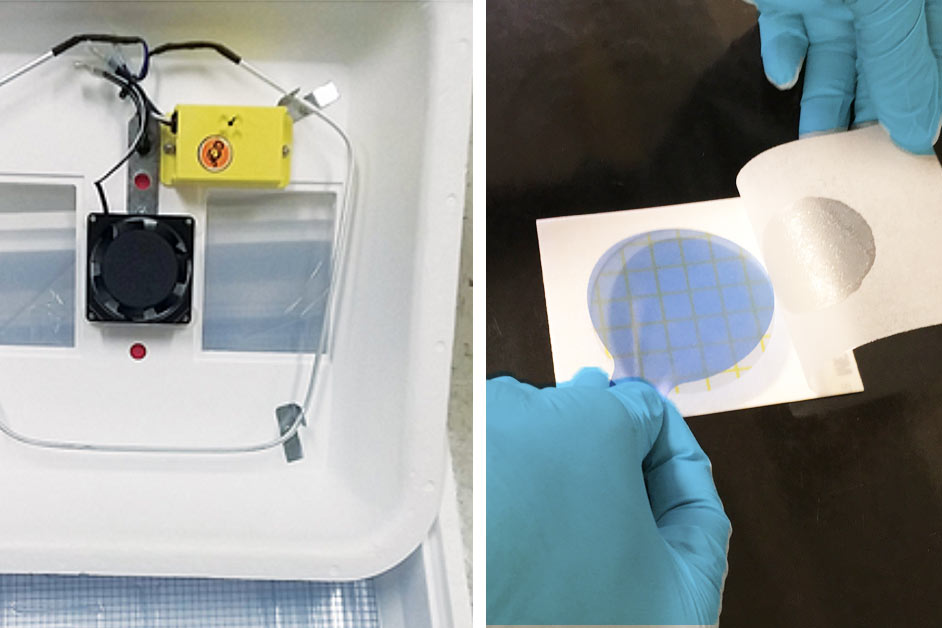
Necessary Materials
Photo

Photo
Photo
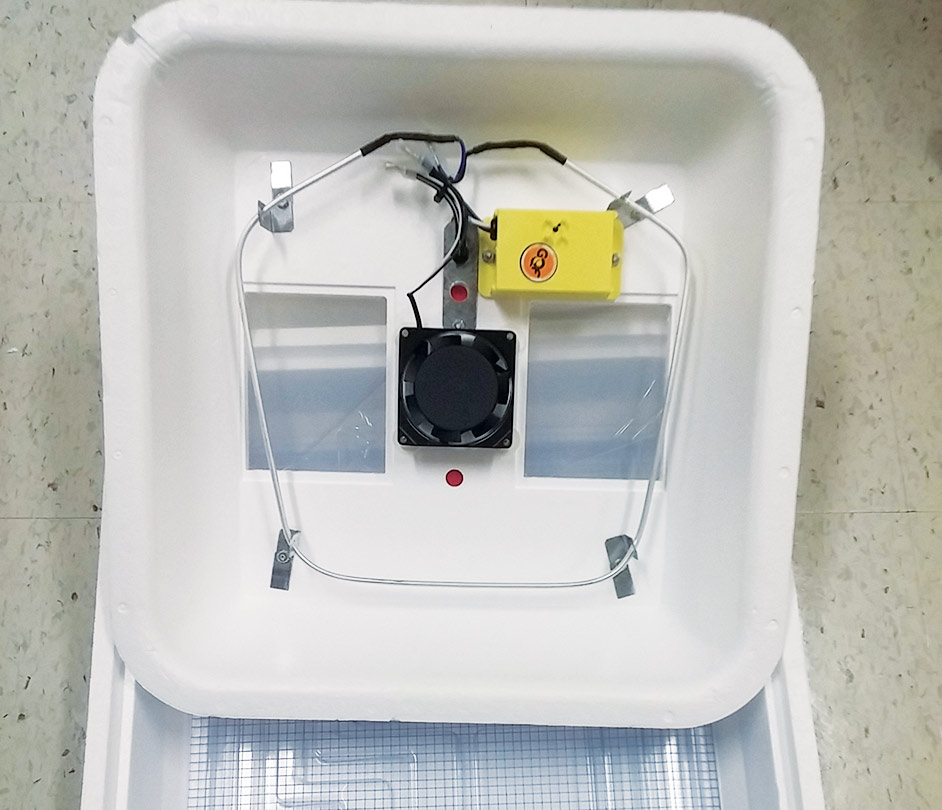
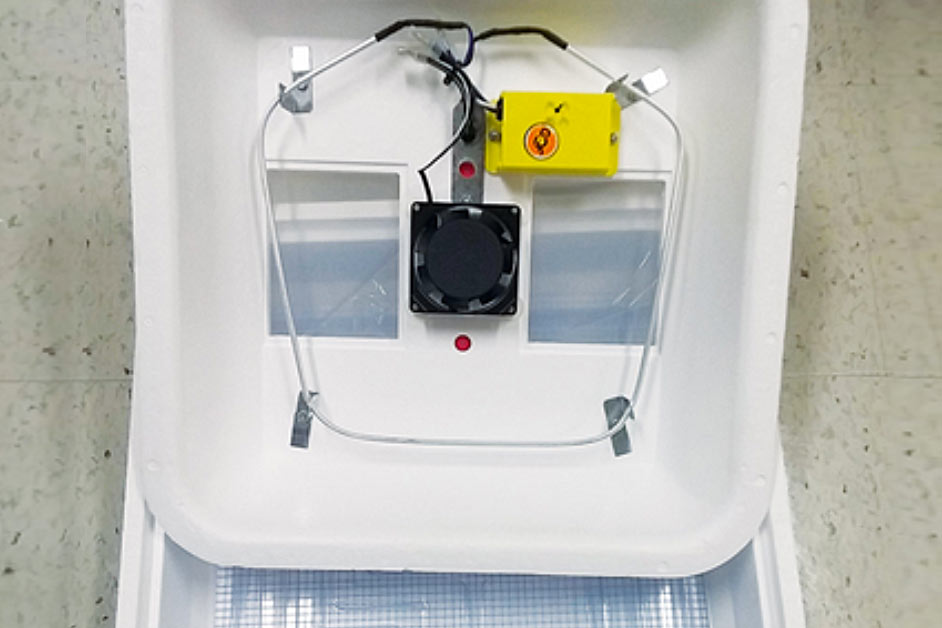
Incubator
(The recommended incubator is the Turbofan Hova-Bator 1602, available from your local agricultural retailer; consult internet to locate the dealer nearest you.)
Marker pen
Storage and Handling of Plates of MQM Kit
CAUTION
- The on-farm identification system should be used in mild or moderate cases of mastitis (grade 1 or 2) without fever (< 39.5 °C) and in the absence of other severe diseases.
- Its critical to develop a sampling protocol and a treatment protocol based on the use of this system in collaboration with your veterinarian.
- If clinical symptoms worsen, take immédiate action and consult your veterinarian.
To Order
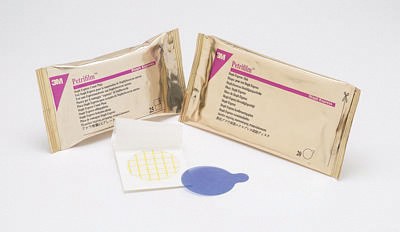
The MQM Mastitis Treatment Decision System uses 3MTM PetrifilmTM enumeration plates to identify mastitis bacteria in milk. To order an on-farm MQM kit, please contact:
- Your local veterinarian
- Maritime Quality Milk
To order PetrifilmTM products directly or to consult a representative, please contact innovation Diagnostics, Inc.
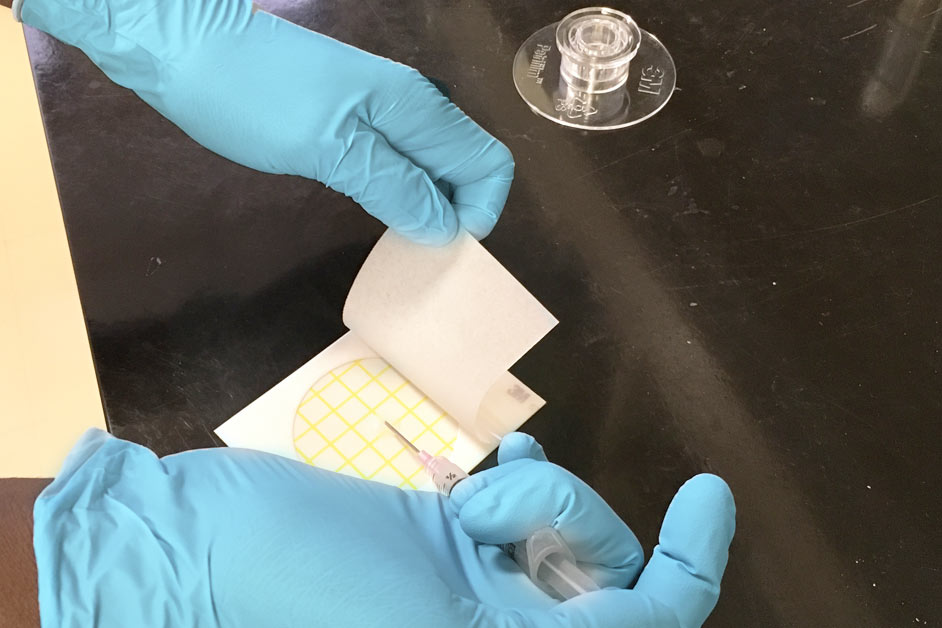
Inoculation of the AC Petrifilm TM Plates
Step 1
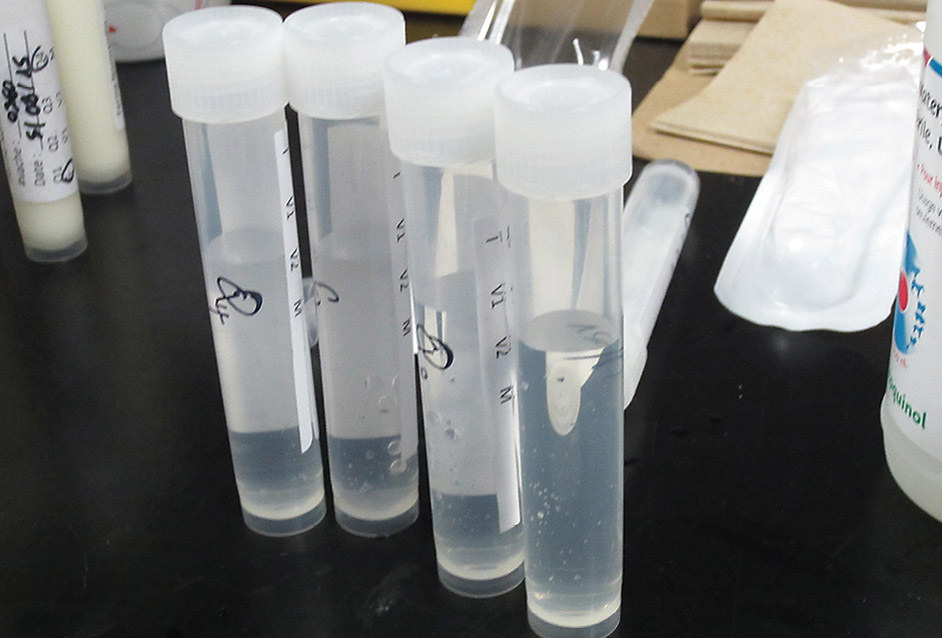
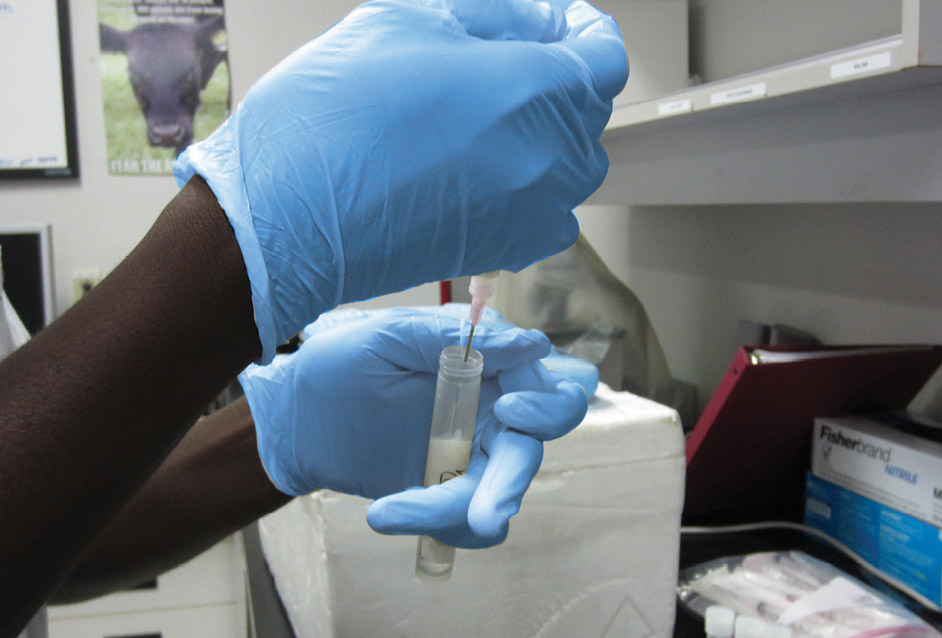
Take 9 ml of sterile water and place in a sterile tube. The syringe should not come in contact with the inside of tube or cap, nor should they be touched.
Step 4
Homogenize : Once cap is in place, rotate the tube containing the diluted milk back and forth at least 5 times.
Step 7
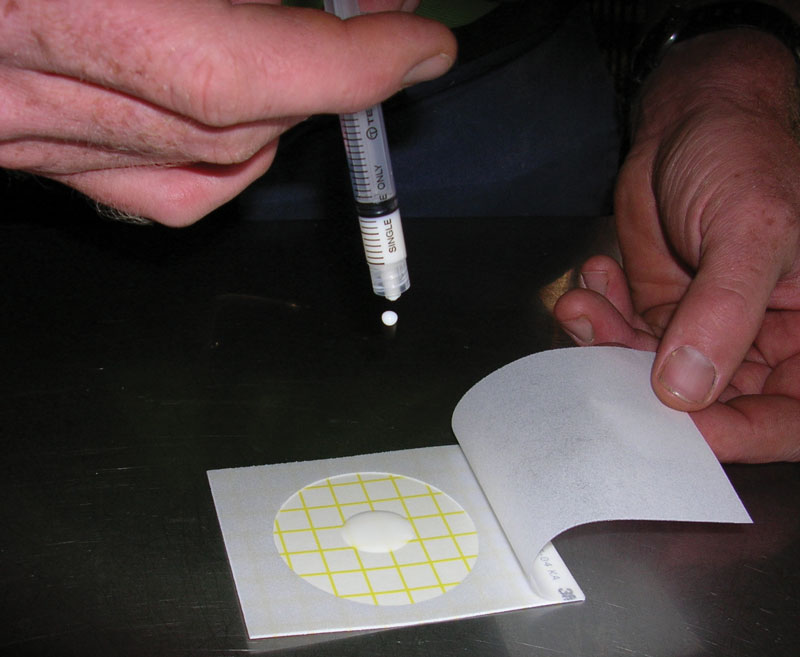
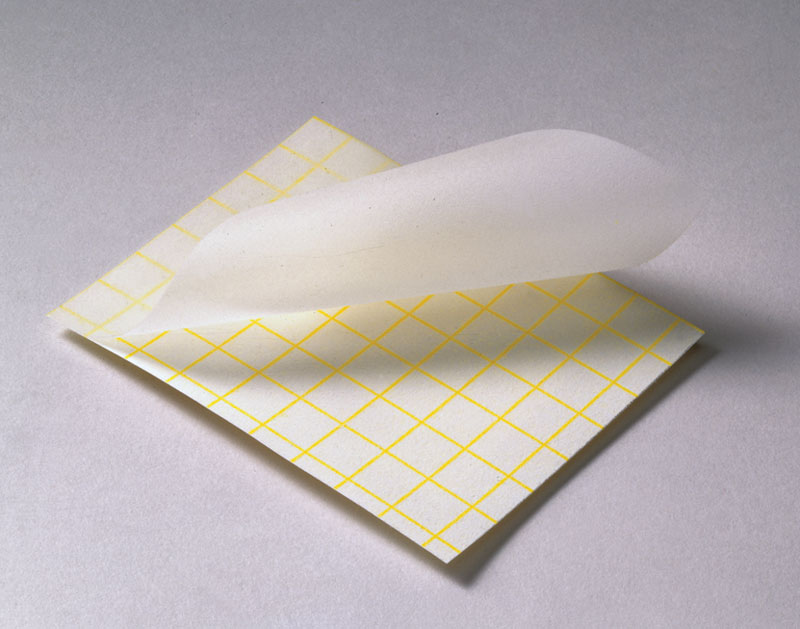
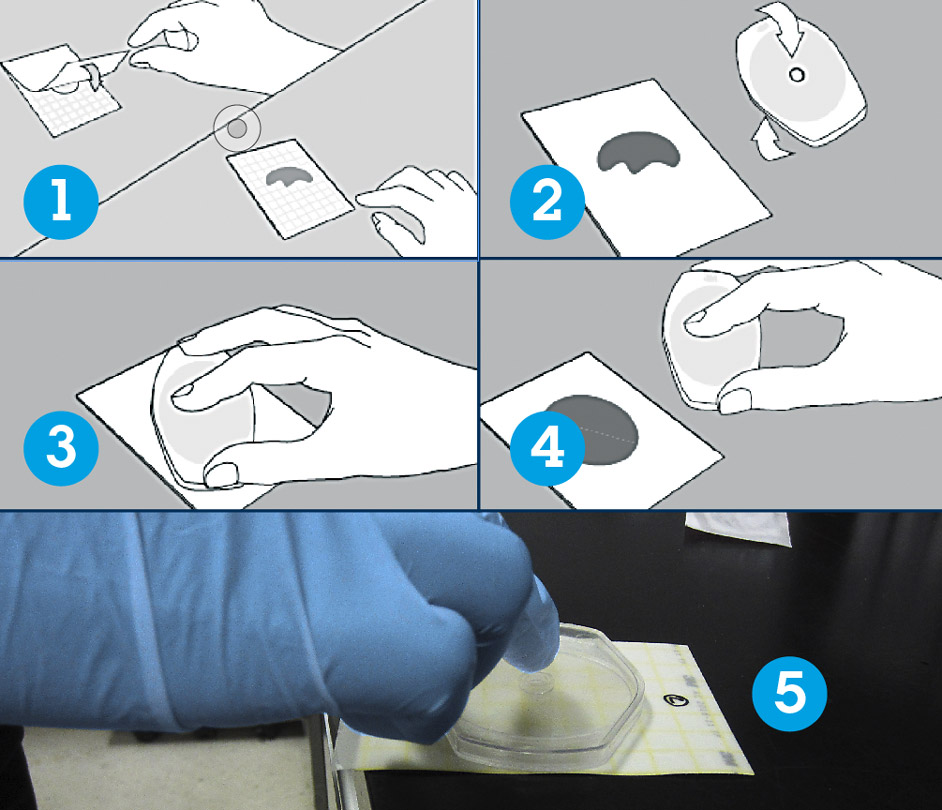
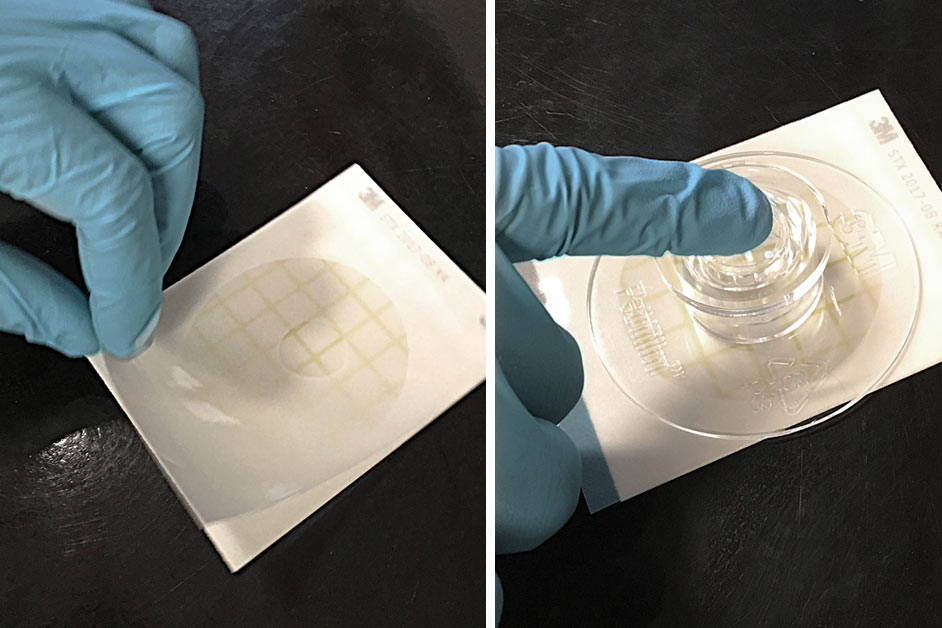
Release the top film. Place the applicator over the top film (circular side down) and lightly apply pressure to spread the sample over the circular area.
Image credit: 3M
Step 2
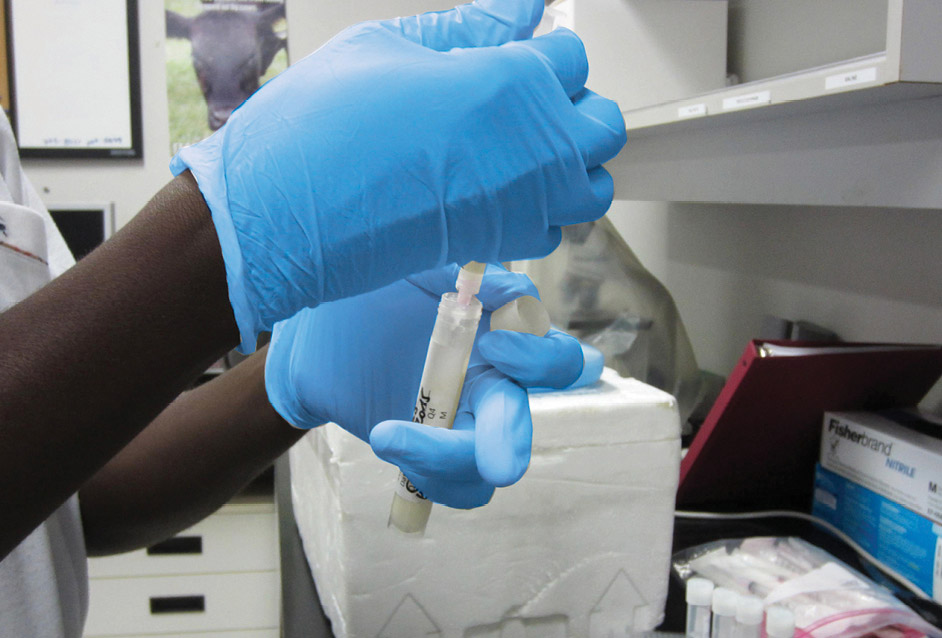
Draw 1 ml of the milk sample.

Step 5
Draw 1 ml of diluted milk using the same syringe and release back into the tube to rinse the syringe.
Step 8
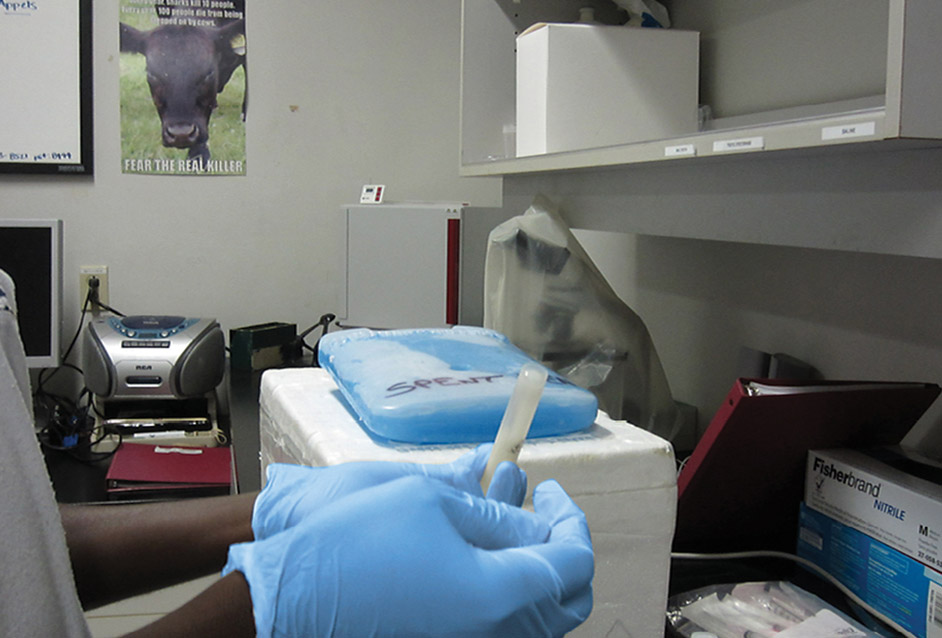
Place the Petrifilm in the incubator at 35 °C (95 °F) for 24 hours. Make sure it contains some water to maintain some moisture.
Step 3
Place 1 ml of milk in a tube containing 9 ml of sterile water (1:10 dilution).

Step 6
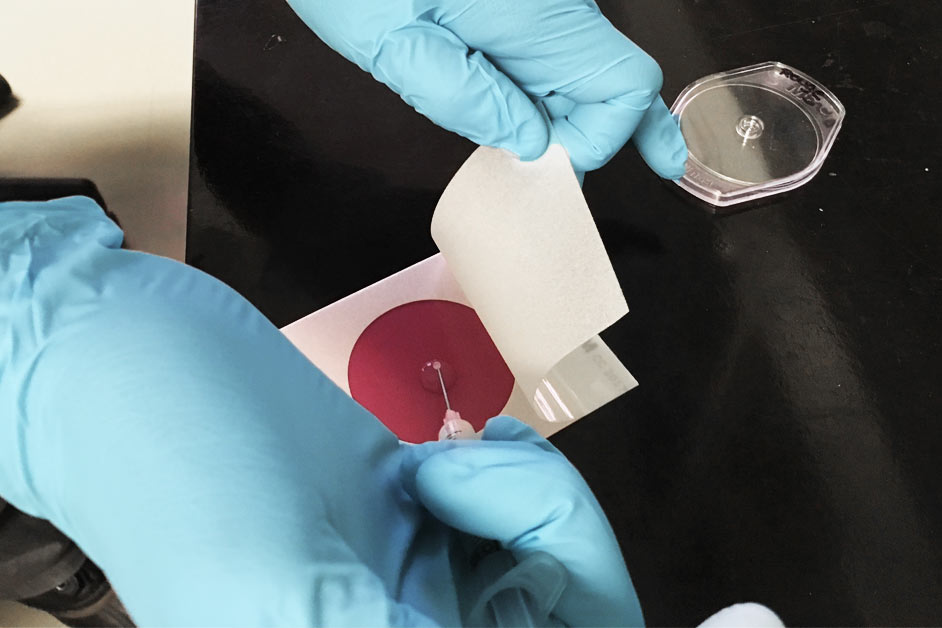
Place the pre-identified Petrifilm plate (cow, quarter, date, time) on an even surface, lift the top film, then place 1 ml of diluted milk in the enter of the lower film without touching it with neither syringe nor fingers.
Step 9
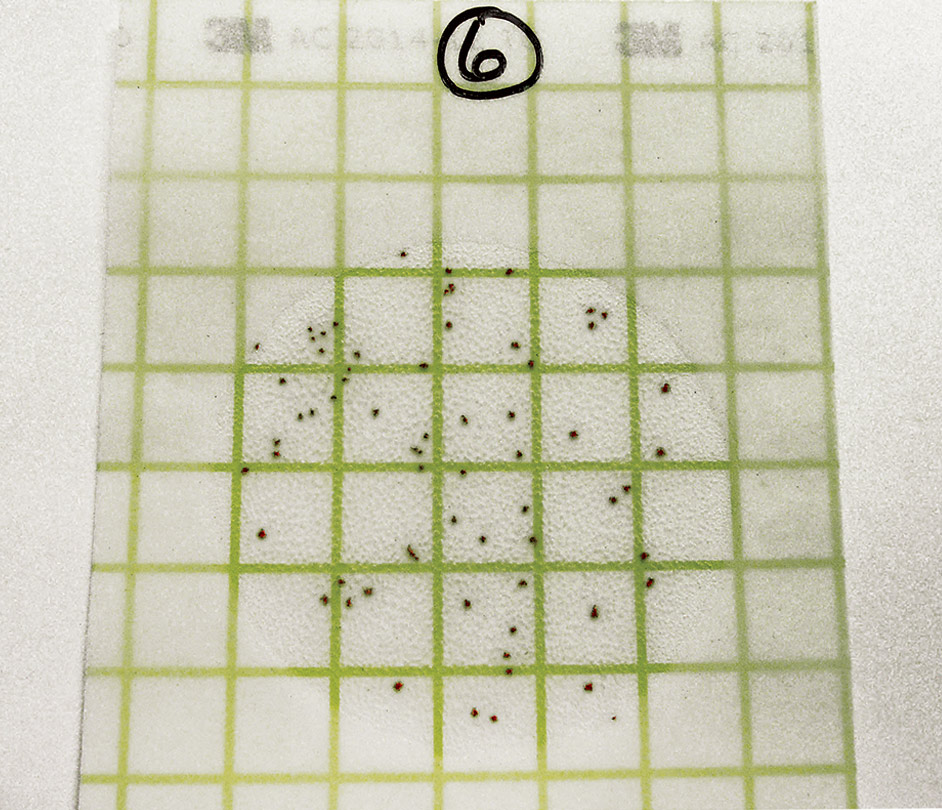
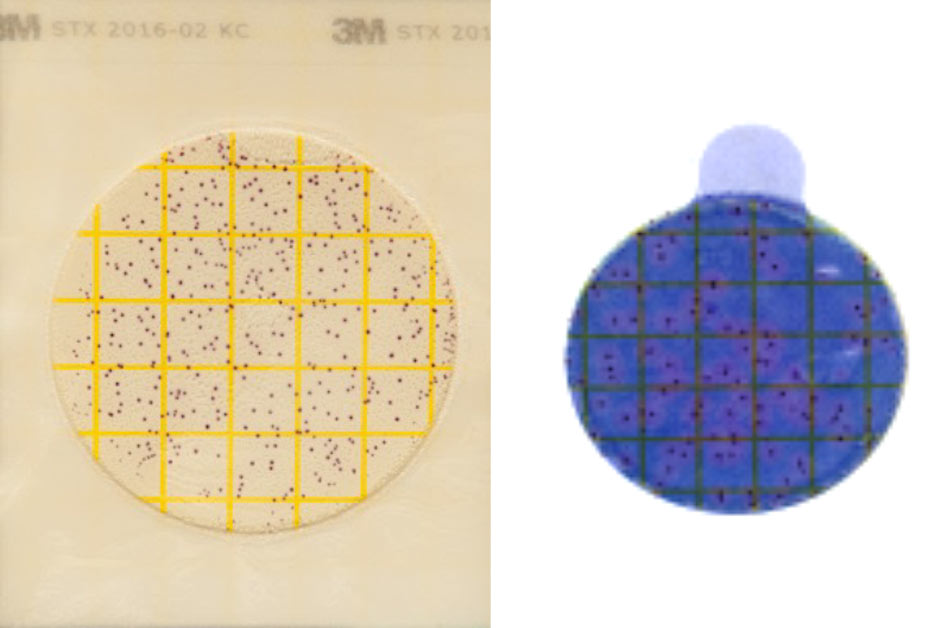
Read the results on the Petrifilm. Each point represents a bacterial colony. Count the entire plate, not just a square. Record the results in your files.
Inoculation of the Petrifilm CC
Step 1
Take 9 ml of sterile water and put in a sterile tube. Do not touch the inside of the tube and cap with the syringe or fingers.
Step 4
Homogenize : Once cap is in place, rotate the tube containing the diluted milk back and forth at least 5 times.
Step 7
Step 2
Take 1 ml of the milk sample.
Step 5
Take 1 ml of diluted milk using the syringe used previously. Aspirate and return the diluted milk once, to rinse the syringe.
Step 8
Place the Petrifilm in the incubator at 35 °C (95 °F) for 24 hours. Make sure it contains some water to maintain slightly moist conditions.
Step 3
Put 1 ml of milk in a tube containing 9 ml of sterile water (dilution 1:10).
Step 6
Place the previously identified Petrifilm plate (cow, quarter, date and time) on a flat surface, lift the top film, then place 1 ml of diluted milk in the center of the lower film without touching it with the syringe or fingers.
Step 9
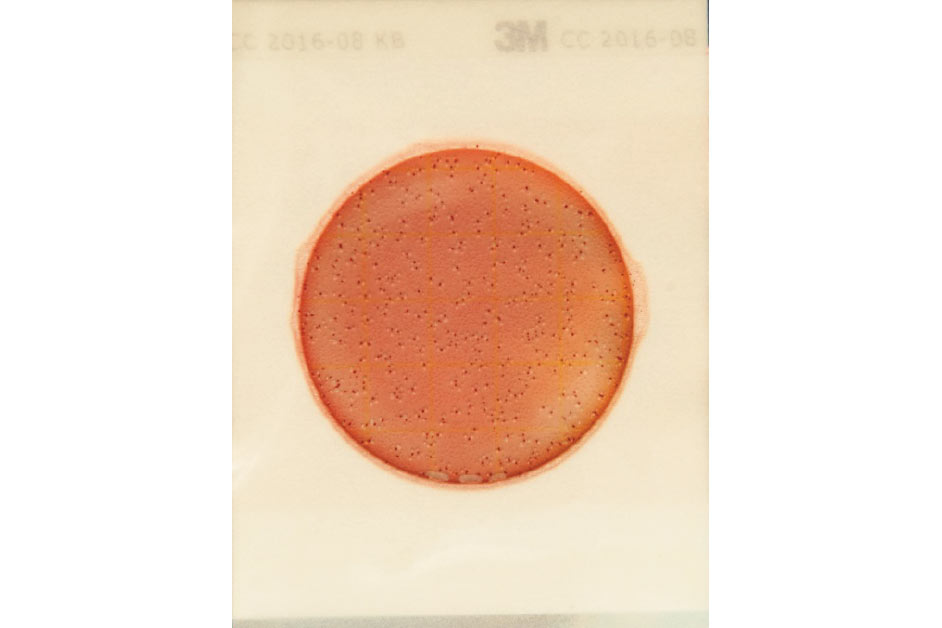
Read the results on the Petrifilm. Each point represents a bacterial colony. Count the entire plate. Record the results in your files.
Inoculation of the Petrifilm STX
Step 1
Take 9 ml of sterile water and put in a sterile tube. Do not touch the inside of the tube and cap with the syringe or fingers.
Step 4
Homogenize : Once cap is in place, rotate the tube containing the diluted milk back and forth at least 5 times.
Step 7
Step 2
Take 1 ml of the milk sample.
Step 5
Take 1 ml of diluted milk using the syringe used previously. Aspirate and return the diluted milk once, to rinse the syringe.
Step 8
Put the Petrifilm in the incubator at 35 °C (95 °F) for 24 hours. Insert purple disc between the plate and the film and incubate for an additional 3 hours at 35 °C (95 °F). Make sure the incubator contains some water to maintain slightly moist conditions.
Step 3
Place 1 ml of milk in a tube containing 9 ml of sterile water (dilution 1:10).
Step 6
Place the previously identified Petrifilm plate (cow, quarter, date and time) on a flat surface, lift the top film, then place 1 ml of diluted milk in the center of the lower film without touching it with the syringe or fingers.
Step 9
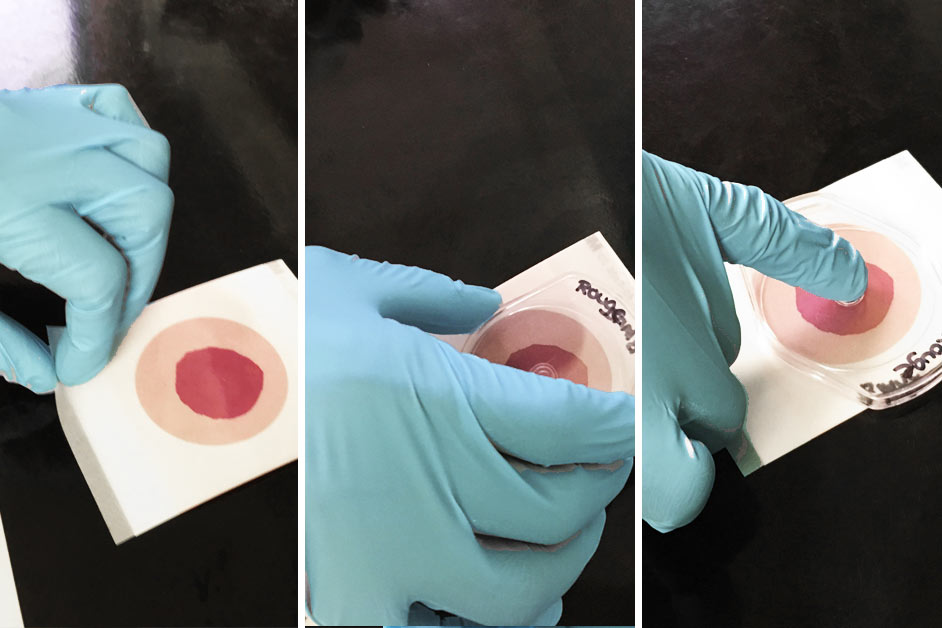
Read the results on the Petrifilm. Each point represents a bacterial colony. Count the entire plate, not just a square. Pink around the colonies confirms the presence of Staph aureus. Record the results in your files.
Interpreting the results (AC and STX)
Some veterinary assistance may be required for result interpretation.
With the help of your veterinarian, establish a treatment protocol according to the Petrifilm results.
Gram categorization (Gram positive, negative or absence of growth) can be obtained with AC an CC plates. An interpretation guide is available at www.milkquality.ca
For cases with positive Staph Express cultures, confirmed with the purple disc, treat as directed by your veterinarian.